Dear friends of Kaibor:
Hello everyone!
In order to allow you to better use our products, special production of this firmware upgrade tutorial, you are welcome to view, if you have questions, please also pro consult the store after sale!
In general, the firmware can be upgraded through the system configuration - Miscellaneous - U disk upgrade, but due to firmware requirements or U disk upgrade is not successful and other reasons, you need a strong brush, the following explanation is the strong brush operation method!
Remarks: Currently the new KIUI4.0 firmware needs a strong brush, please friends follow this tutorial!
Firmware upgrade process text description:
1. Go to the official website service and support column to download the firmware file, unzip it, and copy install.img to the U disk root directory.
2, turn off the player, disconnect the power, insert the U disk to copy the firmware file;
3, with a sharp object resting on the rest hole, turn on the power, the player will automatically recognize the start of the upgrade;
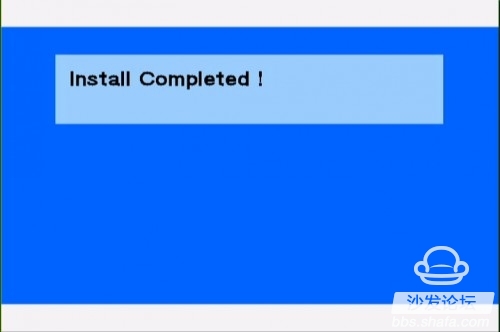
4, the upgrade will prompt: Install Completed, and then you can go into the boot interface to operate!
The following is a sample of the 1185 chip machine in the open Bor to explain the firmware upgrade. The rest of the models are similar. Refer to the operation.
1. Download the corresponding model firmware from the official website of Kaibo.
Extract the downloaded firmware installation file to get an install.img file. Please place the file in the root directory of the U disk.
What is the root directory: that is to open the U disk into the root directory of the U disk. Baidu explained that the root directory refers to the top-level directory of a logical drive. It is a relative subdirectory. Open "My Computer", double-click the C drive to enter the C drive's root directory, double-click the D drive to enter the D drive's root directory. Other analogy.
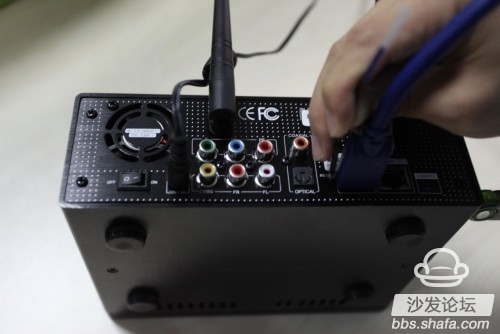
2. Find the "rest" hole in our opener machine!
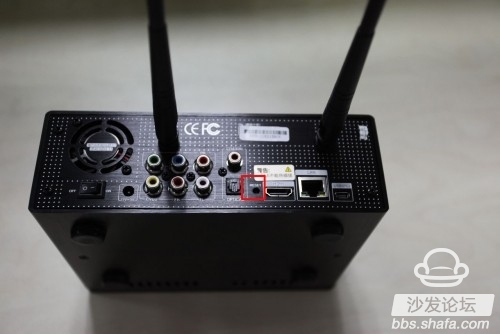
The rest hole of this machine is located next to the HDMI cable. The location of different machines may be slightly different. We can look for the silk screen.
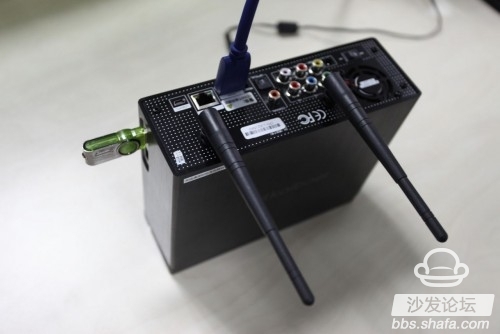
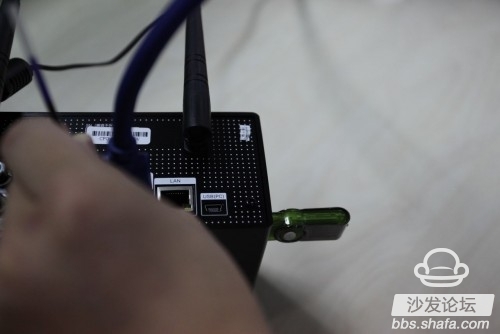
3. In case of shutdown or power off, insert the USB flash drive that has copied the firmware upgrade file install.img into the USB interface of the player.
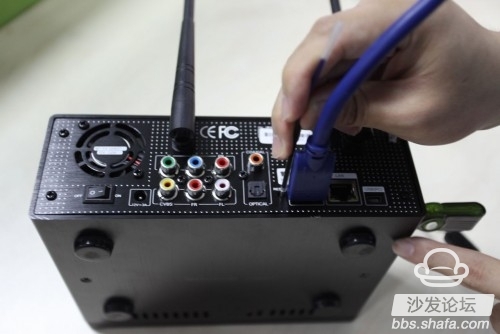
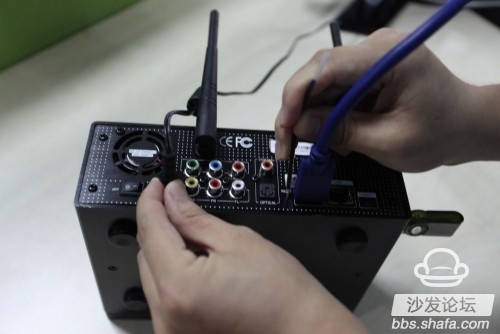
4, with a hard object to withstand the REST hole, the author used a common refill, can also be used toothpick and other objects.
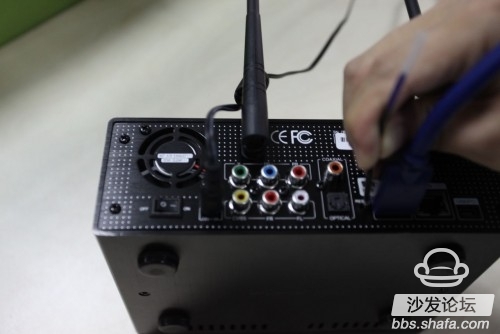
5. Connect the power cable.
Please note: Some machines are not equipped with a power switch and are powered on. Step 6 can be omitted and approximately 5 seconds after the power is turned on, release the hand holding the rest hole.
Turn on the power switch.
6. After turning on the power switch, hold down the hand in the rest hole and then release it about 5 seconds after the power is turned on.
At this point the U disk has started to read data, because the camera relationship can not be seen.
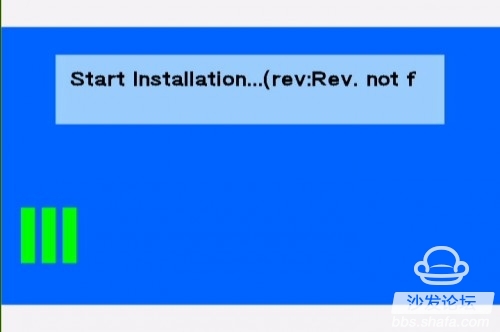
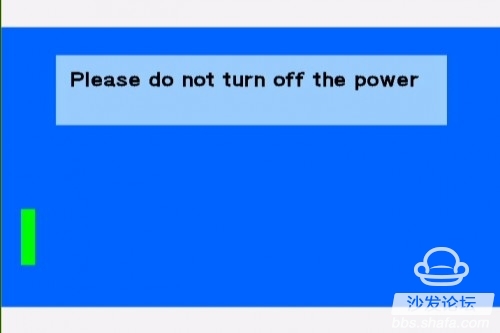
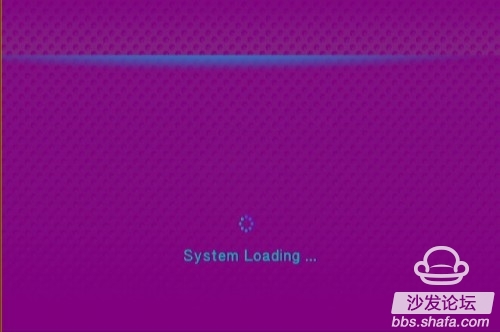
7. The display device coming out of the player starts to respond and has started to upgrade. After that, you can watch the TV screen and wait for the upgrade to complete. Do not disconnect power at this time!
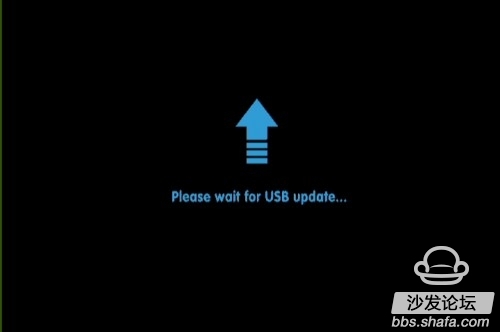
Some machines react quickly, and the interface waiting for upgrade shown in the figure above will almost never jump to the interface shown in the figure below.
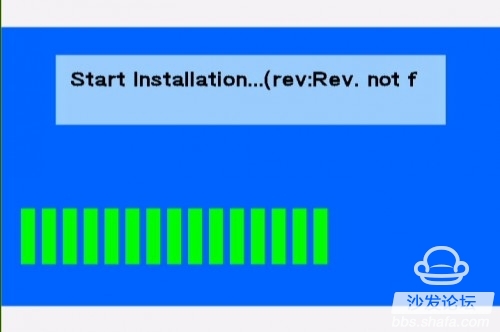
The scroll bar scrolls. Please wait patiently. Do not disconnect the power.
Upgraded prompts!
Enter the system and the resolution is being adjusted automatically.
Some machines do not respond after the prompting language is completed. At this time, the resolution can be switched by pressing the remote control system (mode).
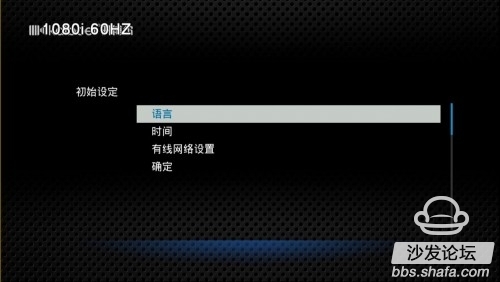
As shown in the figure below, after the upgrade is completed, the system is initialized!
However, some machines may skip directly into the interface, and can also set related settings in the system settings.
After the initial setting is completed, the boot screen is displayed:
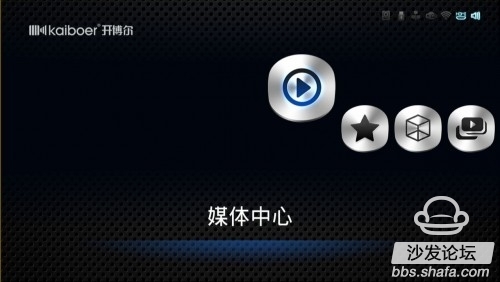
If you need to make other related settings, you can adjust the system settings.
For friends who still have questions about machine firmware upgrades, please consult the Kaibol after-sales service for help!
Hello everyone!
In order to allow you to better use our products, special production of this firmware upgrade tutorial, you are welcome to view, if you have questions, please also pro consult the store after sale!
In general, the firmware can be upgraded through the system configuration - Miscellaneous - U disk upgrade, but due to firmware requirements or U disk upgrade is not successful and other reasons, you need a strong brush, the following explanation is the strong brush operation method!
Remarks: Currently the new KIUI4.0 firmware needs a strong brush, please friends follow this tutorial!
Firmware upgrade process text description:
1. Go to the official website service and support column to download the firmware file, unzip it, and copy install.img to the U disk root directory.
2, turn off the player, disconnect the power, insert the U disk to copy the firmware file;
3, with a sharp object resting on the rest hole, turn on the power, the player will automatically recognize the start of the upgrade;
4, the upgrade will prompt: Install Completed, and then you can go into the boot interface to operate!
The following is a sample of the 1185 chip machine in the open Bor to explain the firmware upgrade. The rest of the models are similar. Refer to the operation.
1. Download the corresponding model firmware from the official website of Kaibo.
Extract the downloaded firmware installation file to get an install.img file. Please place the file in the root directory of the U disk.
What is the root directory: that is to open the U disk into the root directory of the U disk. Baidu explained that the root directory refers to the top-level directory of a logical drive. It is a relative subdirectory. Open "My Computer", double-click the C drive to enter the C drive's root directory, double-click the D drive to enter the D drive's root directory. Other analogy.
2. Find the "rest" hole in our opener machine!
The rest hole of this machine is located next to the HDMI cable. The location of different machines may be slightly different. We can look for the silk screen.
3. In case of shutdown or power off, insert the USB flash drive that has copied the firmware upgrade file install.img into the USB interface of the player.
4, with a hard object to withstand the REST hole, the author used a common refill, can also be used toothpick and other objects.
5. Connect the power cable.
Please note: Some machines are not equipped with a power switch and are powered on. Step 6 can be omitted and approximately 5 seconds after the power is turned on, release the hand holding the rest hole.
Turn on the power switch.
6. After turning on the power switch, hold down the hand in the rest hole and then release it about 5 seconds after the power is turned on.
At this point the U disk has started to read data, because the camera relationship can not be seen.
7. The display device coming out of the player starts to respond and has started to upgrade. After that, you can watch the TV screen and wait for the upgrade to complete. Do not disconnect power at this time!
Some machines react quickly, and the interface waiting for upgrade shown in the figure above will almost never jump to the interface shown in the figure below.
The scroll bar scrolls. Please wait patiently. Do not disconnect the power.
Upgraded prompts!
Enter the system and the resolution is being adjusted automatically.
Some machines do not respond after the prompting language is completed. At this time, the resolution can be switched by pressing the remote control system (mode).
As shown in the figure below, after the upgrade is completed, the system is initialized!
However, some machines may skip directly into the interface, and can also set related settings in the system settings.
After the initial setting is completed, the boot screen is displayed:
If you need to make other related settings, you can adjust the system settings.
For friends who still have questions about machine firmware upgrades, please consult the Kaibol after-sales service for help!