The silver salt is digitized, as the name suggests, is to convert traditional films into digital documents for convenient communication or filing on the Internet.
Select scanner:To sum up, the most cost-effective and playable is the special bottom sweep, now more popular is Epson's GT-X series, Hong Kong's behavioral V series. Today is the Epson GT-X970/V750 Pro (National Bank Code) to be introduced.
Do not look at dead or expensive, but if you pass through Japan and Asia, starting prices in the United States and Asia is still quite acceptable. Nichia is probably about 2500 softcoin, the price is very moderate.
The landlord himself was booked by Japan and Asia, and then human flesh came back from Japan and said that it was tears. At that time, the price was more than 3,200 softcoin dollars. Nowadays, the GT-X980 is launched. The stock code is V850 Pro, so it naturally goes down. If the wallet is suitable, it is recommended to start with the latest products, compared to the V750's largest upgrade is equipped with ReadyScan LED cold light source, only 1S to start, almost no preheating, and optimized to a greater extent to avoid the scan in the negative process The color deviation is distorted, and the light source brightness is also enhanced, which greatly improves the scanning speed. The new folder has been upgraded to the Fluid mount adapter. It comes with a glass tablet, which is no longer subject to the negative curvature of the negative film scan. The lens coating is also improved, making the image color reproduction more accurate.
The landlord's hands are only GT-X970 for the time being, today's children talk about this machine, compared with the State Bank V750 Pro, one day line of the machine does not support the domestic voltage, need to use the transformer. The two countries have less than a set of German silver fast Silverfast SE 8 genuine Chinese software. These are difficult to fail us. First of all, the voltage problem is that the transformer is large and ugly. It is not cheap to say that the land is occupied. The universal Ma Yun family, of course, proposed a solution for this. Original power adapter, 50 softcoin, bid farewell to the transformer.
Select software:Then the German silver fast Silverfast SE 8 software set, a little understanding of the scan some friends know that the original software that comes with the scanner can only meet the general home use, LaserSoft Imaging scan this piece is still more professional . And support for PC and MAC, you can also scan special frames such as XPAN, 6X17 and so on. Direct purchase on the official website will automatically determine your operating platform based on your browser. 49 Euro, digital version, can be downloaded directly after order. Now the exchange rate is also good, and it will start directly. In addition to the most basic SE version, there are SE Plus and Ai Studio. The most cost-effective or SE version, also supports the ability to output HDR RAW files, similar to digital camera RAW files, and friends who know how to play photography know that RAW is the king for the later period.


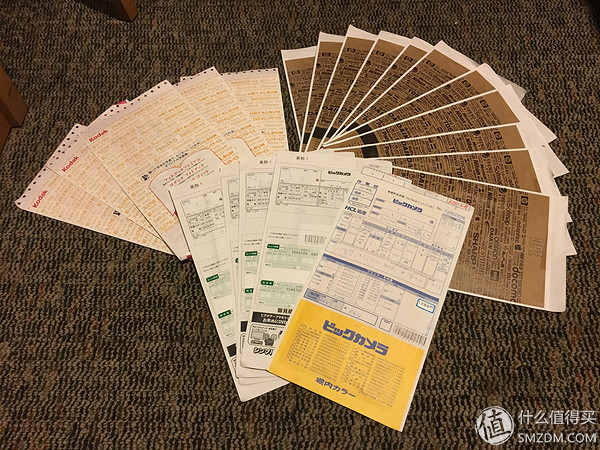
With the hardware and the software, we have to use the media. Here I have to complain about the film processing of Modu. Although the entire film industry has declined and has slumped, the Modu area could not find one. The quality of the flush shop, not the price war online is the process of chaos. Many of my friends bought expensive film cameras, medium-format pictures, and spent money on equipment. But they compared the prices on the prints to find cheap ones. Since it takes time to photograph precious images that can be used as memories, it is not very important in the washing process. The cost of washing is fixed. The medicine needs to be changed every day. Even if only one roll is used, the next day must be Replacement, otherwise the final image will cause color cast. Nowadays, the film washing market is in a sluggish state. There is not so much daily printing demand. In the environment where the flushing costs are rising steadily, there are still a lot of flush shops below the cost price. Among them, the tricky oneself figured out. I have tried a lot of magic, a variety of self-proclaimed high-quality small workshops, old printing shops, but the quality is really worrying, scratches, uneven, dust. We should not think this is normal. In the past, in the New York advertising company, in the mainstream era that was still filmed with film, after the film was sent for printing, it was guaranteed that the film was smooth, scratch-free and dust-free. This was a qualified flush. The basic rules of the store should be. The print shops that are still fairly good today are mostly concentrated in Royal Park and Sichuan, but since unprocessed film can only be transported by land and placed in X-ray proof lead bags, since I have to send them out for washing, I prefer to choose the oldest Hong Kong company . The other party supports telegraphic transfer or Paypal payment. The craftsmanship and results are very satisfactory. However, because they belong to audio and video products, they will be dismantled and examined by the Customs when sent back from Hong Kong. This is inconvenient. After all, some are personal privacy. Send Shun Feng called when the pickup, courier brother asked me to be, I said that did not film, courier brother insisted that each roll will be opened to view, repeatedly explained to him, and after his numerous telecommunications superiors Stop
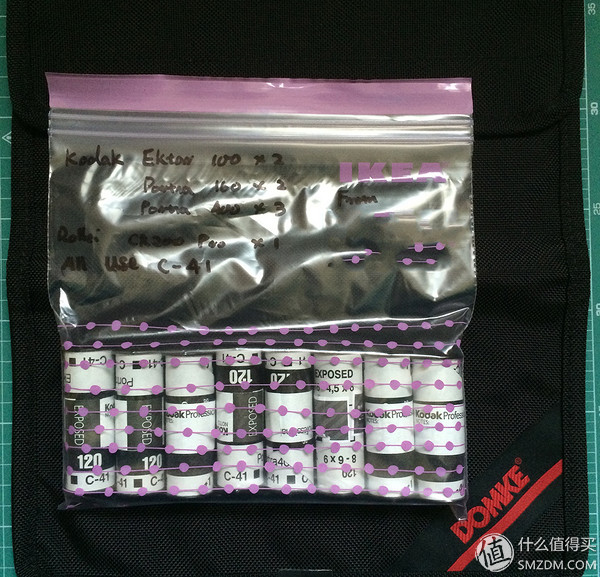
However, I now generally wash off the film all year round while traveling to Japan. After all, the service quality is guaranteed. Fujifilm production sites, and they still have Kodak factory, Kodak Kodak film, and others. The area is all kinds of brand syrup mixed red, or third-party manufacturers of syrup. This is just a part of the back, light washing took 1000 soft brothers.
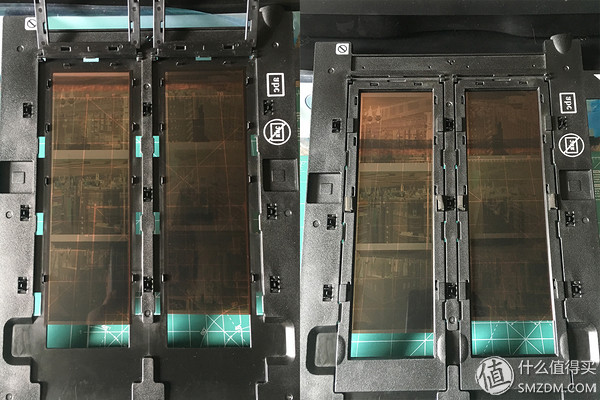
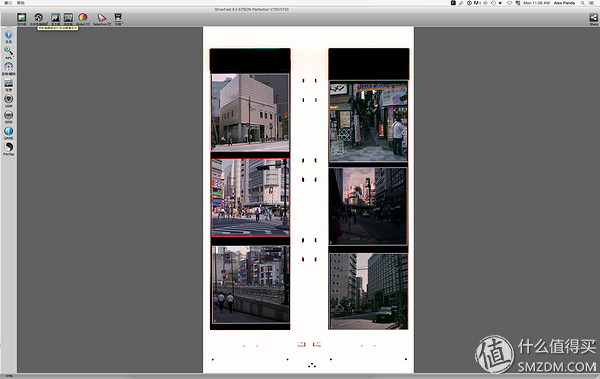
As a basic tutorial, we use the original clip that comes with this product. GT-X970 comes with four cassettes. The film cassette meets the needs of different players. 35mm positive x 24 frames, 35mm negative x 24 frames, 35mm slide x 12 frames 120/ 220 positive and negative (6x12cm) x 2 cells "4x5" positive and negative x2 cells. And with the exclusive "8x10" large-spot scanning area, 20 35mm slides can be scanned at a time through Epson's exclusive "8x10" transmissive large-scan area, which can scan 20 35mm slides at a time.

Ready to scan the film, this is a good rinse 120 negative film. Because there is no film viewer, this simple point can use ipad to replace the light source, even with natural light or computer monitors can be, but indispensable is the viewing glass magnifying glass, there is Glass lenses, of course, the price is very high, Ma Yun family also has a sale, to more than 500 soft sister coins, resin lenses, lightweight, easy to meet the general use, Japan to buy, more than 50 soft sister money. If you have meters in your pocket, you can do it all.


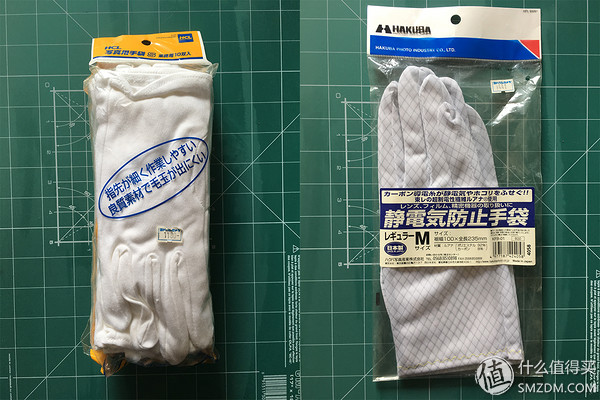
Second, in order to prevent greasy fingers, fingerprints contact the film base, when removing the film, wear anti-static dust-free gloves, if you can not use disposable nitrile gloves or powder-free medical gloves.

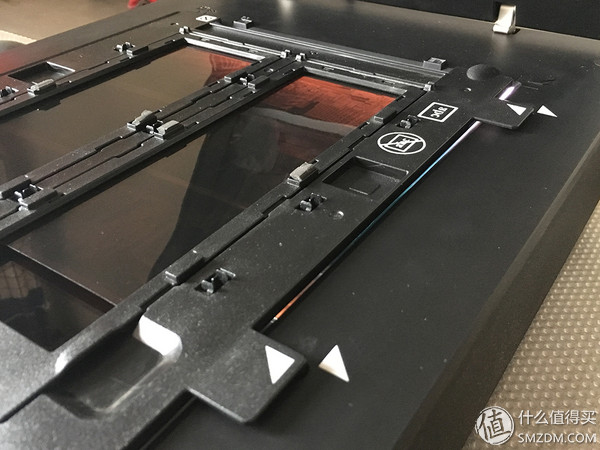
When everything is ready, press the photo 匣 , , , , , , , , , , , , , , , , , , , , , , 把 把 把 把 把 胶片 胶片 匣 匣 匣 匣 匣 匣 匣 匣 匣 匣 匣 匣 匣 匣 匣 匣Faces.) The text after insertion should be the same as that of the movie script.

Cover the cassette, all the buckles should be buckled in the end, press the film base, otherwise it will affect the scanner focus distance. Before the scan, use a gas blow to remove as much foreign material as possible, such as dust and hair on the film. Finally, press the arrow on the right side of the photo frame and the arrow on the scanner. Cover the scanner and prepare for scanning.
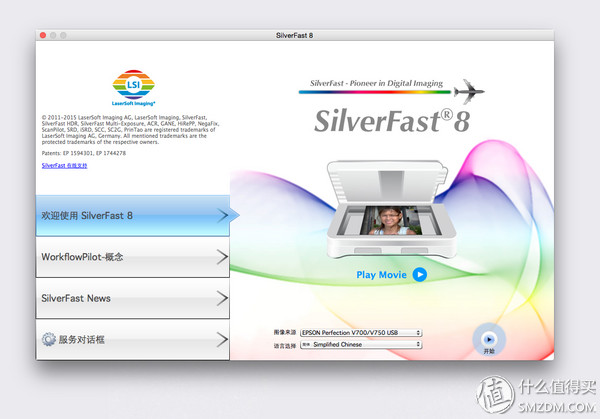
Next, open the scanner and launch the SilverFast software. The input source will be recognized automatically. The language can be selected. There is Simplified Chinese, and then press Start to continue. The first and most important part of the first scan is the basic setup of the software, including the selection of the color space, which determines the quality and color of the final film. Insert one sentence, any scanning software, all need to close all automation functions, reduce the automatic intervention of the program, for example ICE dusting, except for scratches, automatic color, automatic decolorization, etc., all need to be turned off, some functions are started by the program by default, so Turn off the automation of these programs within the preferences/basic settings. Because the scanning software algorithms are very programmatic, it does not like people to distinguish what is good and what is bad, for it is just an algorithm and does not represent We are actually willing to do this. So turn off these and send them to Photoshop or LR for later finishing.
After opening it for the first time, please open Preferences (MAC)/Preferences (PC) to adjust the color gamut of the color management system to Adobe RGB 1998

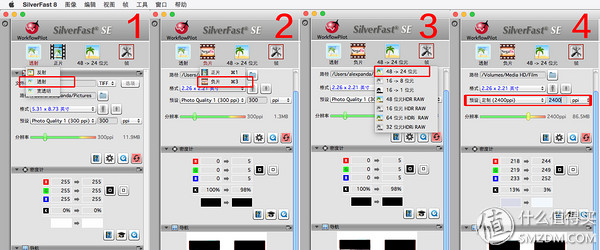
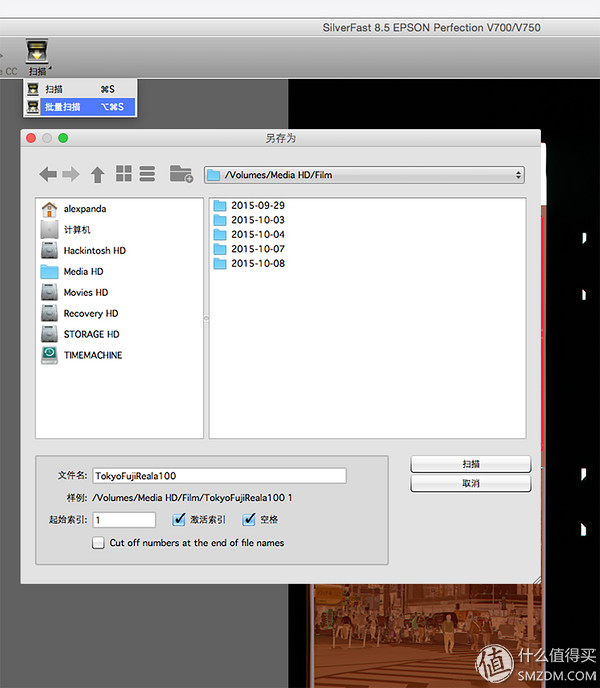
Then the first step, choose the type of scan, the film is transparent, so choose "transmission", if it is 8X10 film please select "wide transparent." The second step, choose the type of film, this time to scan the Fujifilm Reala100 color negative film, so choose "negative film", if you scan the black and white film is also to choose a negative film, reverse film is to choose "positive film." The third step is to set Frame, color reversal film and color negative film to select 48->24 bits. For color advanced scanning, select 48-bit HDR or 64-bit pixel HDRi; when scanning black and white, select 16->8 bits. For black and white advanced scans, select either 16-bit HDR or 32-bit HDRi. The fourth step, set the scan file name, file format (negative film recommendation TIFF, positive film recommendation DNG), output path, and select the accuracy you need to scan, directly enter the ppi value, the larger the frame, the smaller the ppi can be scanned The smaller the frame size, the larger the ppi that can be scanned. The 8x10 frame is usually scanned with 1200 ppi. It is sufficient for network communication. 120 frames are generally 2400 ppi, and 135 frames should be scanned at 6400 ppi or more.
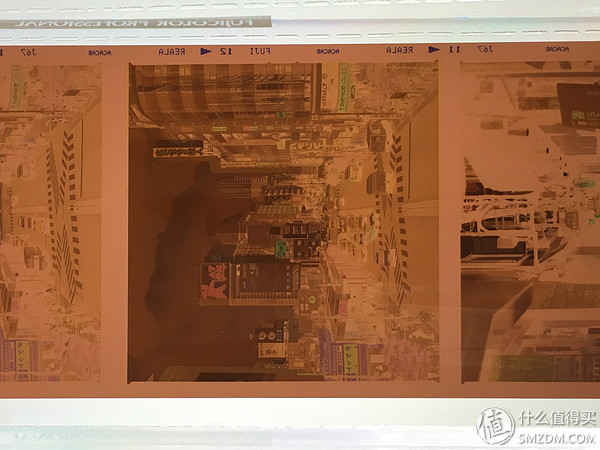
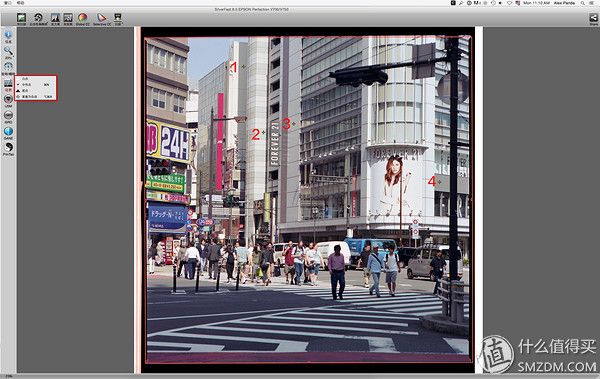
After the preview gets a rough picture quality, the default result of the first pre-scan is to select a large red area. Adjust the red box ("Frame") box to select the range of photos you want to scan. Less film bases are selected because the scanned files are calculated according to the PPI of the scan area. Unusual scans will increase the scan time and the scanned file size. Finally, these extra sizes will be cut off. The bigger it is, the easier it is to crash during the scan. If you need to scan in batches at the same time or select a multi-scan area, one method uses the left mouse button to continue the selection, and the other is Command+D. Copy the currently activated selection area to copy and drag directly Scanned area can be. If you need to adjust the size of the picture, when you scan the parameters, just click on the corresponding selection area, when the frame becomes red, it is the current selection area. Delete the red frame ("Frame") can press Command + Backspace Delete the key, or select Delete in the "Frame" option. You can also use the auto-find button.

As you can see, here I used the automatic demarcation function. Sometimes the program is not that smart, so if you only recognize 5 or fewer, you can use the copy-scratch area feature to add manually. Now we have 6 6x6 frames. The negatives, but also used to automatically remove the color cast, now the color looks normal, and then we began to make detailed adjustments. If you do not remove the color mask, you can also click on the automatic color offset next to the pre-scan to adjust.
The next step is to do manual work. In this initial tutorial, we can do it in the SF software. This is the most convenient. First correct the white balance mask, and then there is a button on the left called the straw, which is the white balance option. The white triangle "white spots" can absorb the highlights in the photos. This depends on the specific situation, because not every photo will necessarily have the brightest part. If not, we can use the color scale to adjust; the gray triangle "neutral point â€, is the most important tool for the first step to absorb the film base color mask and the second step to absorb the gray in the diagram for white balance (click the “neutral†straw, then hold down the Option key, Four reference neutral points can be acquired simultaneously in the diagram to achieve the most accurate white balance possible.) Black triangle "black dots" is the black point in the image, which is generally used to absorb the film base, because the film base Is not photosensitive, in theory, this is the darkest area of ​​your film, you can click on the film to get the darkest part of the film, and then rely on the color scale to adjust the light and dark, and then use the contrast to adjust the overall effect.
Next, we will perform some basic color corrections according to the final results that we want to achieve. Below are some basic functions provided by SilverFast, until we adjust to the desired effect, and then press scan to start (Note: Scan only scans the current Active frame).

If you need to scan all the frames, long press Scan to select the batch scan and set the corresponding file name and access path.
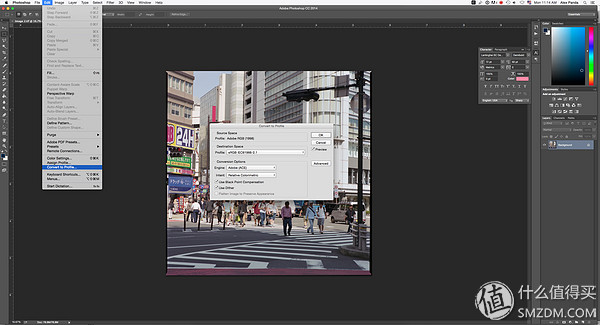
Finally put the image into the PS for final cutting, sharpening, color correction, etc. . . . After all steps are completed, before storing it as a JPEG and uploading it to the web, we first need to convert the color gamut to a common sRGB on the web, otherwise color gamut mismatch will occur.
Hasselblad 503CW | 150/4 | Fujifilm 400H | Epson V750 | Skytree, Tokyo, Japan

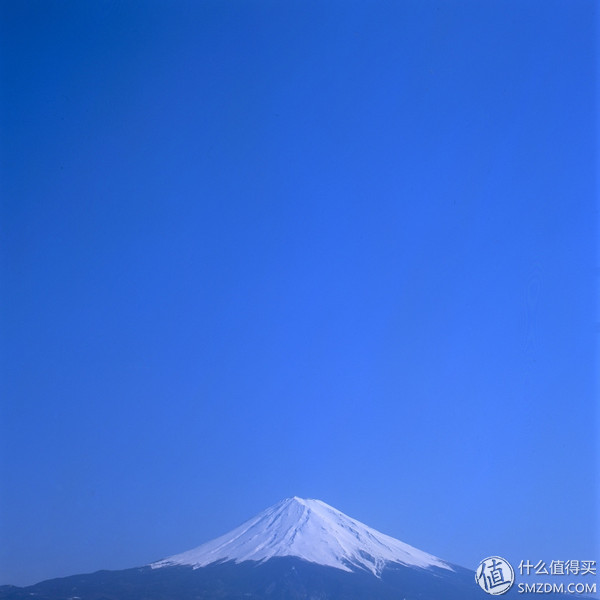
Hasselblad 503CW | 80/2.8 | Fujifilm RVP 50 | Epson V750 | Mt.Fuji, Japan
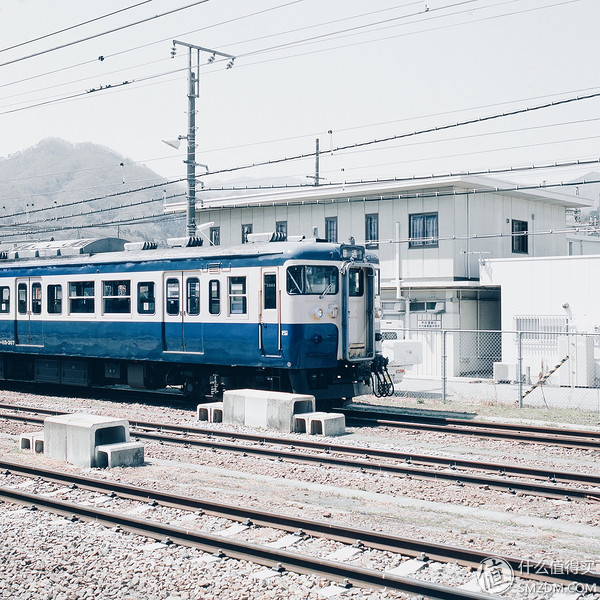
Hasselblad 503CW | 80/2.8 | Kodak Portra 160 | Epson V750 | Mitaka, Japan
If the pursuit of good quality, still need to IQsmart, 9000ed, Imacon X1/X5, I also know that these are really good goods, here is not to prove that a scanner less than 3000 soft sister can and comparable to these High-end machines, high-end film scanners are worth a penny, you say dynamic range, V750 looks like 4.0, Imacon is 4.7, 0.7 gap requires you to pay 100 thousand soft dollars to make up. And we generally have Is used for online communication, so this machine is still very cost-effective.
Extended reading:Color space knowledge
What is the difference between sRGB and Adobe RGB?
The difference between positive, negative and reversal films